VMware vCenter Support Assistant is a free vSphere Web Client plug-in. It provides you with proactive support, by collecting support bundles on а regular basis, analyzing your environment and sending you alerts and recommended fixes for potentially emerging problems.
vCenter Support Assistant provides you an easy-to-use, time-saving application for filing and managing support requests, and for generating and uploading vSphere and vCenter Server support bundles and other files.
VMware vCenter Support Assistant is available as a VA (virtual appliance)
In my last post i wrote about the announcement of the release of vCenter Support Assistant 5.5.
In this two part How-To guide we will look at How to deploy the vCenter Support Assistant 5.5 and also configure it. The two part guide will include
How To Install and Configure vCenter Support Assistant -Part 1
How To Install and Configure vCenter Support Assistant -Part 2
The vCenter support Assistant 5.5 can be downloaded from here

![]()
Log into your vCenter server with the required privileges to deploy a OVF/OVA.
In the vSphere client, select File > Deploy OVF Template.
Browse to the vCenter Support Assistant Appliance file with the .ova extension and click Open.

Click Next.
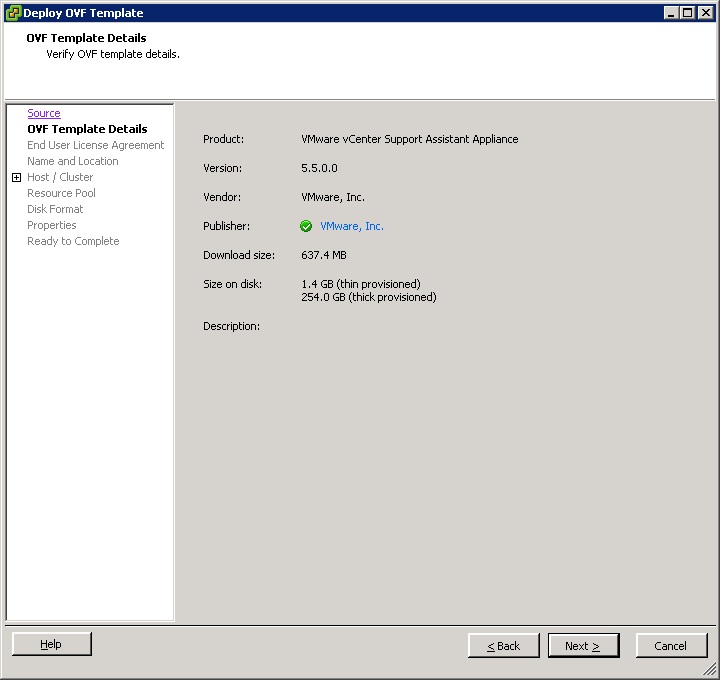
Click Next on the OVF Template Details page.

Accept the license agreement and click Next.
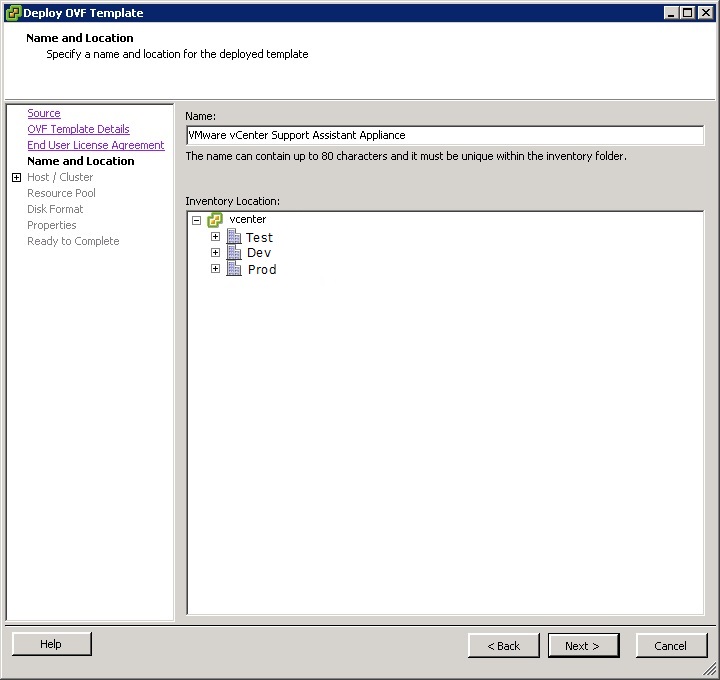
Type a unique virtual appliance name according to the IT naming convention of your organization in the Name text box, select the datacenter and location to which you want to deploy the virtual appliance, and click Next.

Select the HOst/Cluster where you prefer to deploy the Appliance.

Select the Resource Pool(If Any) and proceed.
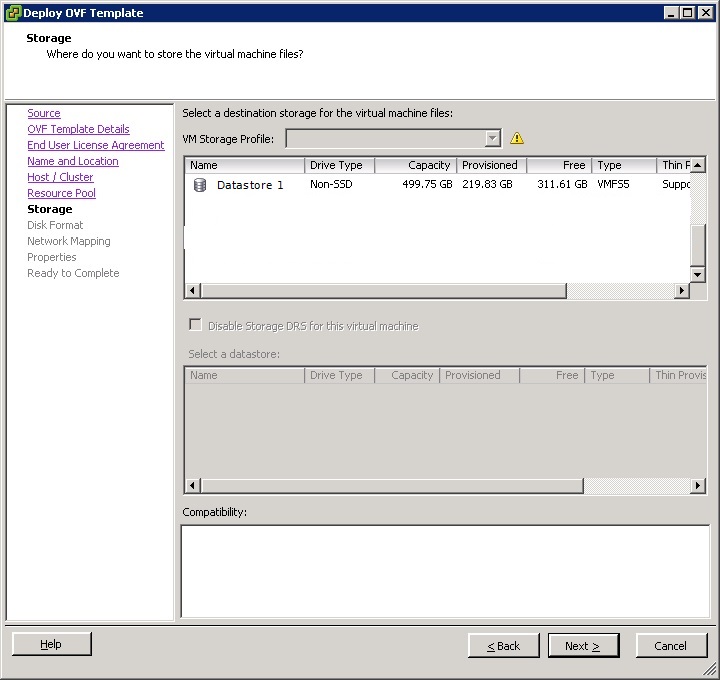
Select the datastore where you intend to place the Virtual Appliance files.
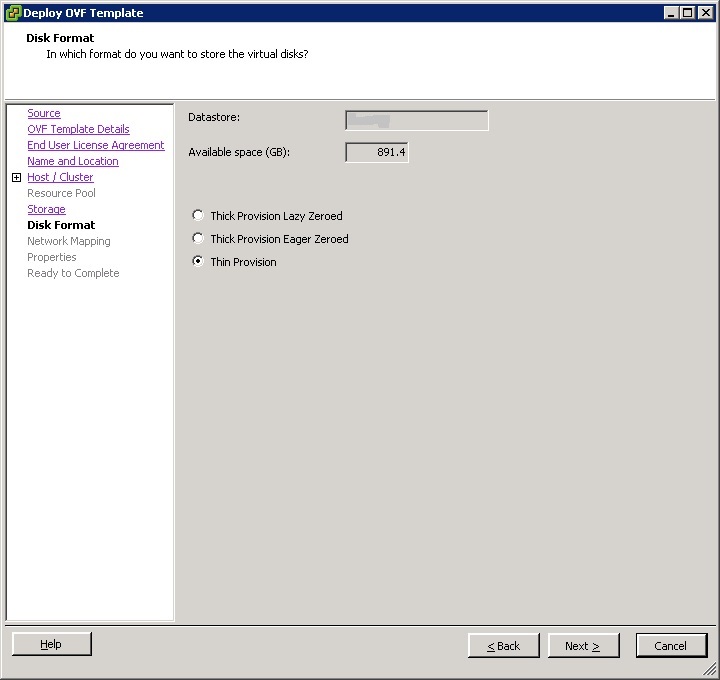
Verify that there is enough space to deploy the virtual appliance on the Disk Format page and click Next.

Choose the network to deploy the machine on.
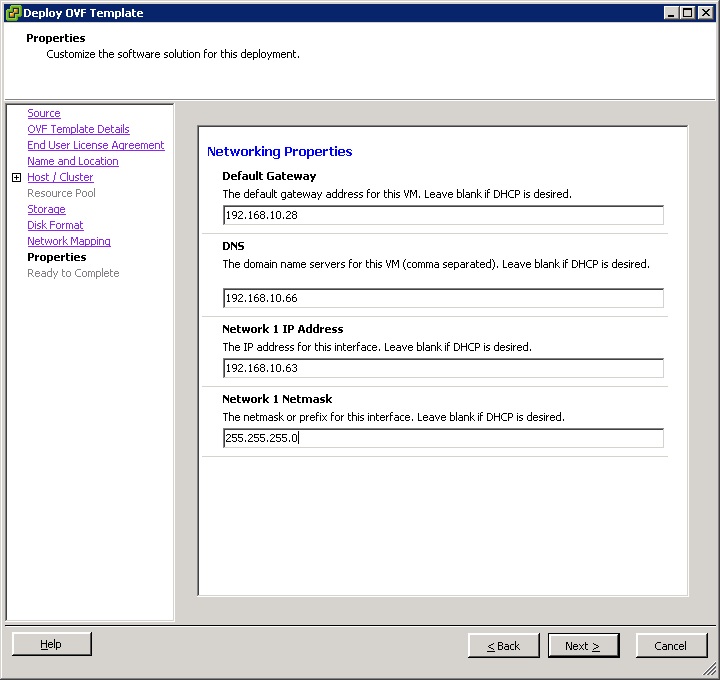
Follow the prompts to the Properties page. The options displayed depend on your vSphere configuration.
Configure the values on the Properties page.
Click Next.
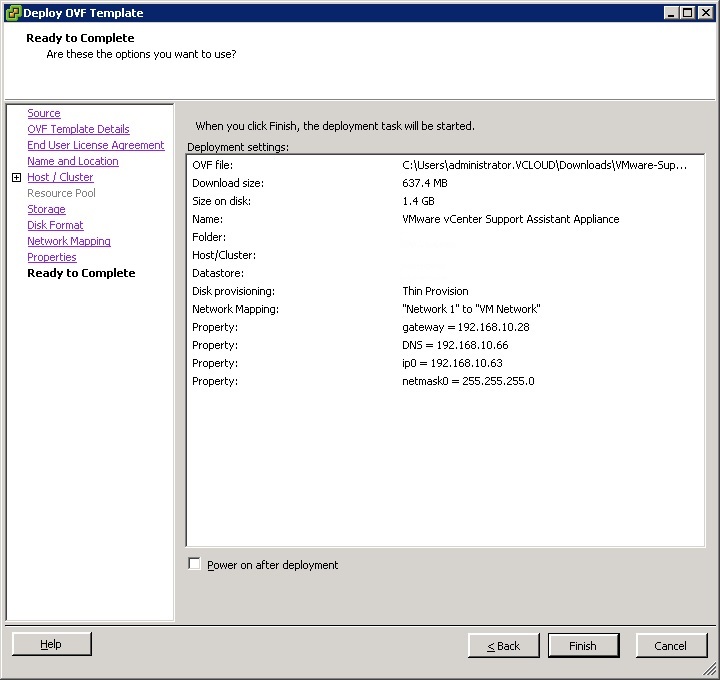
If the Power on after deployment option is selectable on the Ready to Complete page, select it and click Finish.

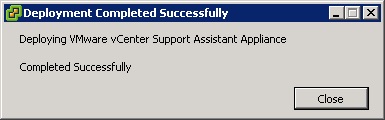
We have sucessfully deployed the vCenter Support Assistant Appliance.
This completes our Part-1 of Install and Configure vCenter Support Assistant.
Let’s move on to
How To Install and Configure vCenter Support Assistant -Part 2